Contents
When you’re suddenly faced with a flood in your home, knowing the right steps for 24-hour emergency water restoration is crucial. First, you must assess the damage swiftly and ensure everyone’s safety by turning off the power and suiting up in protective gear. But what do you do next? Quickly removing the water and starting the drying process can seem overwhelming. How can you effectively use fans and dehumidifiers, and what are the best practices for preventing mold growth? Let’s break down these essential steps, explore the importance of each, and discuss how to handle this stressful situation with precision.
Key Takeaways
- Immediately assess the water type and damage and document them for insurance claims.
- Switch off power and use protective gear to ensure safety.
- Contact professional restoration services quickly to minimize damage.
- Remove standing water with pumps and dry areas using fans and dehumidifiers.
- Disinfect and prevent mold by maintaining humidity below 50%.
Assess the Damage Immediately
When faced with water damage, it’s crucial to assess the extent immediately to mitigate further losses. You’re not alone in this; everyone experiencing such disruptions feels the same urgency.
Start by identifying the source of water. This step isn’t just about stopping the flow; it’s about understanding the type of water involved, which can affect the restoration approach significantly.
Next, you’ll want to assess the structural integrity of your home. Water can weaken building materials, leading to potential hazards. Check for any visible changes in the floors and walls. Are they bulging or cracking? These could be signs of serious structural damage needing immediate attention.
Don’t forget to look at the ceilings, too; sagging could indicate trapped water overhead.
Document everything meticulously. Take photos and make notes about the damage. This documentation will be invaluable for insurance claims and future repairs.
You’re building a case and a roadmap for restoration at the same time.
Ensure Safety First
Before tackling any repairs, it’s crucial to ensure your safety and that of others in the vicinity. Water damage can create hidden hazards, and ignoring them can be costly, both to your health and property.
First, switch off the main power supply to avoid electrical shocks, especially if water has seeped into electrical appliances or near outlets. This is the first step in your safety protocols to prevent any immediate threats.
Next, assess the stability of your surroundings. Steer clear of sagging ceilings or floors that might collapse under weight. Wear protective gear such as gloves, boots, and a mask to shield yourself from potentially contaminated water or mold growth, which can pose serious health risks.
Keep emergency supplies like a flashlight, batteries, and a first aid kit accessible. You might face a situation where the power is out for an extended period, or you need to address minor injuries immediately. Having these supplies at hand ensures a quicker response to accidents and instills a sense of preparedness and security.
Remember, standing water is a breeding ground for bacteria and mold. If you suspect the water is from a potentially hazardous source, like sewage backup, it’s best not to engage without proper equipment.
Document the damage for insurance purposes with your phone or camera, but only after confirming it’s safe to do so.
Contact Professionals Quickly
Once you’ve ensured your immediate safety and documented the damage, promptly reaching out to water restoration professionals is your next step.
It’s crucial to act swiftly, as the longer water sits, the more extensive the damage can become. You’re not alone in this—professional services specialize in mitigating the effects of water damage, ensuring that your home gets back to safe living conditions quickly.
Having a list of emergency contacts for local water restoration services can be a lifesaver. Ideally, this list should be accessible easily—perhaps stored in your phone or pinned on the refrigerator door.
When you call, be ready to describe the extent of the water damage so they can prepare the appropriate tools and strategies. Experts in this field come equipped with the necessary technology and skills to handle various levels of water intrusion.
A professional team will assess the situation, prevent the spread of damage, and start the restoration process.
They’re trained to identify the sources of water, which could include anything from burst pipes to floodwaters. By understanding the category and class of water damage, they can employ the most effective methods to restore your property.
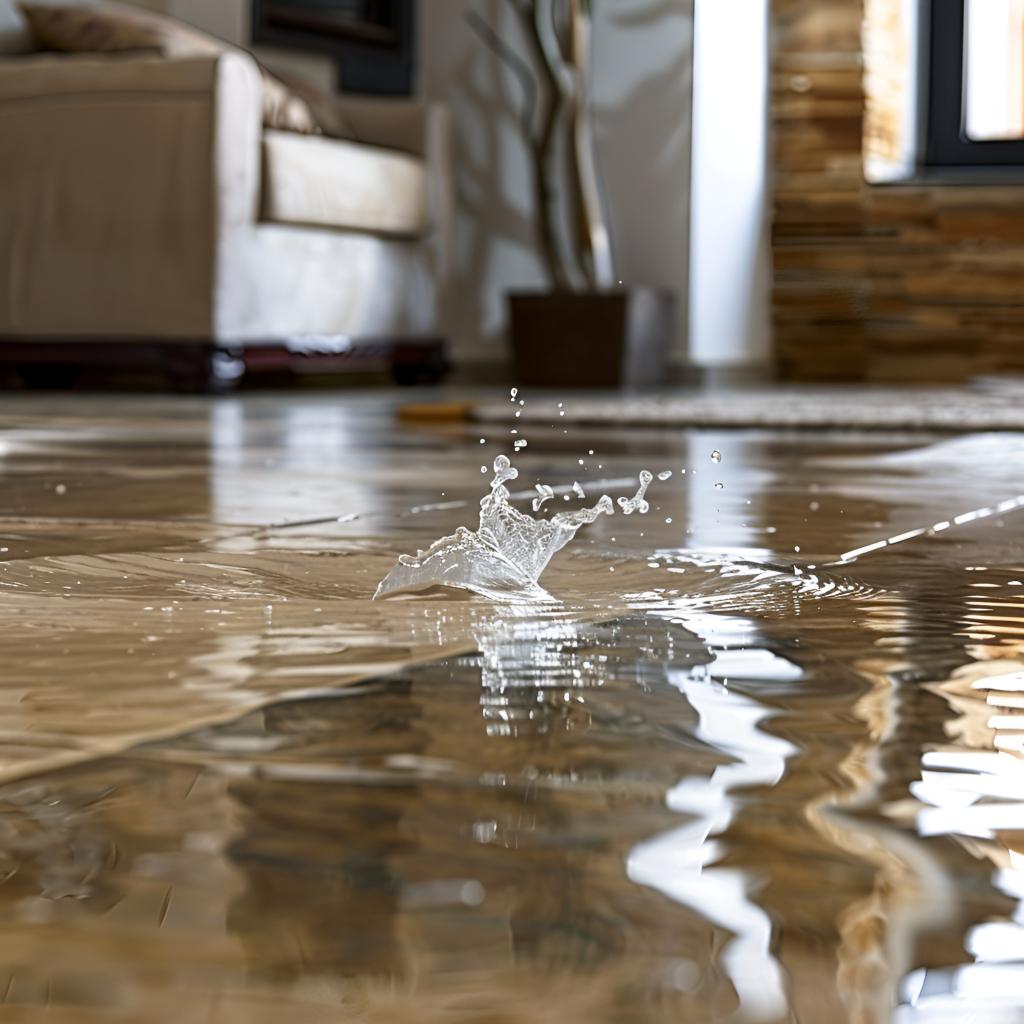
Remove Standing Water
After contacting professional help, your next step is to remove any standing water from the affected area. This critical action can prevent further damage and mold growth, ensuring a safer environment for you and your loved ones.
Start by assessing the extent of water pooling. If it’s manageable, use buckets and mops to clear the water. However, for larger volumes, you’ll need more robust water extraction tools. A submersible pump, available from most hardware stores, is ideal for this task. Ensure you understand the pump operation before starting; it’s crucial to set it up correctly to avoid any mishaps.
Position the pump in the deepest part of the water, usually a corner or a low-lying area, and use a sturdy hose to direct the water outside, away from the foundation of your home. Keep an eye on the pump’s operation; you don’t want to overwork the equipment, but you need to be thorough to extract as much water as possible.
Safety is paramount during this process. Always wear rubber boots and gloves to protect yourself from potentially contaminated water. If you’re using electrical pumps, ensure the power source is dry and secure to avoid electrical hazards.
Engaging in this task helps mitigate damage and fosters a sense of control and contribution to the restoration of your home. It’s a significant step that brings you closer to reclaiming the space from the chaos caused by water damage.
Dry Affected Areas
Now that you’ve removed the standing water, it’s crucial to dry the affected areas thoroughly to prevent mold and mildew from setting in. Proper drying techniques and humidity control are essential to safeguard your home and create a healthy environment for your family.
Firstly, you’ll want to use high-powered fans and dehumidifiers to accelerate the drying process. These tools help circulate air and reduce humidity levels, making it harder for mold to grow. Strategic placement is key—position your fans to blow across the wet surfaces directly and set up dehumidifiers in central locations to capture more moist air.
Here are a few more tips to ensure you dry your spaces effectively:
Increase Airflow: Open windows and doors to enhance ventilation if the weather permits. Fresh air will help reduce the dampness faster.
Focus on Hidden Areas: Don’t overlook spaces like under furniture, behind walls, and in closets. These areas can harbor moisture and are prone to mold growth.
Use Desiccants: Silica gel and clay desiccants can absorb moisture from the air and are particularly useful in confined spaces.
Monitor Humidity Levels: Use a hygrometer to keep tabs on the room’s humidity. Aim to keep it below 50% to prevent mold proliferation.
Check Progress Regularly: Every few hours, reassess the situation to determine if areas are drying effectively and adjust your tools and techniques accordingly.
Salvage Valuable Items
After addressing the drying of affected areas, you must turn your attention to salvaging valuable items, which requires immediate and careful action.
First, prioritize identifying and securing critical documents; these are irreplaceable and vital for post-disaster recovery.
Next, move on to protecting electronic devices from further damage and carefully handling artwork to prevent deterioration.
Identify Critical Documents
Identifying critical documents quickly becomes essential when salvaging valuable items from water damage. In the chaos of a flood or leak, knowing where your legal paperwork and document storage are located can save you significant time and stress.
You’re not just rescuing paper; you’re preserving pieces of your life that connect you to your community and your rights.
Here are some crucial documents you should prioritize:
- Birth certificates and passports: Vital for proving identity and handling legal affairs.
- Property deeds and car titles: Essential for establishing ownership and managing property issues.
- Insurance policies: Critical for initiating claims and understanding coverage details.
- Marriage certificates and divorce decrees: Important for confirming legal relationships and entitlements.
- Wills and power of attorney documents: Necessary for managing estates and making crucial decisions on behalf of others.
It’s wise to keep these documents in waterproof containers and, ideally, in an easily accessible yet secure location in your home.
This way, you’re prepared for an emergency and fostering a sense of security and continuity for yourself and your loved ones.
Protect Electronic Devices
Following the safeguarding of your critical documents, your attention should shift to protecting electronic devices from water damage. In the frenzy of a water emergency, it’s crucial you act swiftly to save your valuable electronics. The first step is to unplug all devices immediately to prevent electrical hazards.
Quickly move them to higher ground, away from any potential water source.
Next, consider investing in waterproof storage solutions. Waterproof containers and bags can provide a temporary safe haven for electronics until the risk of water damage subsides. This proactive measure isn’t just about immediate protection; it’s a long-term investment in the safety of your belongings.
You also shouldn’t overlook the importance of electronic insurance. This coverage can be a lifesaver, offering financial protection against the costs of water damage.
Check your current policy’s terms and consider additional coverage tailored for electronics. It’s a community of support that ensures you aren’t facing these challenges alone.
Handle Artwork Carefully
In the chaos of a water emergency, handling your artwork with care is crucial to avoid further damage.
Remember, every piece you save adds to your cherished collection, reinforcing your sense of place and continuity.
Here’s how you can protect and potentially restore your valuable artwork with effective preservation techniques.
- Assess and Prioritize: Quickly evaluate the condition of each piece.
Prioritize items based on their value—sentimental or monetary—and their exposure to water.
- Handle with Dry Hands: Always ensure your hands are dry when handling artwork to avoid additional moisture transfer.
Use clean, soft cloths to support the item from beneath.
- Elevate Artworks: If possible, elevate the artwork off the floor to prevent further water contact.
Use clean, stable surfaces for support.
Avoid Direct Sunlight: While drying, keep artworks away from direct sunlight as it can cause fading and additional damage.
Consult Professionals: When in doubt, consult a professional in artwork preservation and restoration techniques.
They can provide the best care and advice for possibly restoring damaged pieces to their former glory.
Implementing these steps will help you manage the immediate threat to your artwork, ensuring that each piece receives the attention it deserves and maximizing the likelihood of successful restoration.
Prevent Mold Growth
To effectively prevent mold growth after water damage, it’s crucial to act swiftly. Mold can start to develop within 24 to 48 hours, so time is of the essence. You’re not just restoring a house; you’re safeguarding your health and the well-being of everyone who steps into your home.
First, identify the common mold types that might invade your space. Black mold is particularly notorious, but don’t overlook other varieties like Cladosporium, Penicillium, and Aspergillus. Each type thrives in moist environments, yet their presence and effects can differ, making accurate identification a key step in effective prevention.
Now, let’s dive into prevention methods. Begin by removing standing water with pumps or vacuums.
Next, you’ll want to dry out the affected areas thoroughly. Use dehumidifiers and fans to circulate air and remove moisture. Check hidden areas like under carpets, in wall cavities, and above ceiling tiles. These are hotspots for mold if left damp.
Your next step is crucial: moisture control. Keep humidity levels in your home below 50% if possible. This can be monitored with a simple hygrometer, a tool that measures humidity.
Regularly inspecting your home for leaks and addressing them promptly also reduces moisture buildup, thereby cutting down the chance of mold setting in.
Disinfect and Deodorize
Once you’ve addressed the moisture and mold, it’s essential to disinfect and deodorize the affected areas to ensure they’re safe and clean. Following water damage, pathogens, and odors can linger, posing health risks and discomfort in your living spaces.
Here’s how you can tackle this crucial step effectively.
Firstly, choose the right disinfecting techniques. You’ll want to use EPA-registered disinfectants to eliminate bacteria, viruses, and fungi that water damage may have introduced. Make sure to follow the product instructions for the best outcomes.
Deodorizing methods are about masking odors and eliminating them at their source. Consider natural options like baking soda or vinegar for mild odors, as well as stronger agents like hydroxyl generators for pervasive smells.
Here are some practical steps to help you disinfect and deodorize effectively:
Ensure ventilation: Open windows and use fans to circulate air and help reduce moisture levels.
Clean thoroughly: Wash all surfaces with soap and water before disinfecting to remove any dirt and debris that can shield harmful microbes.
Use appropriate PPE: When handling disinfectants, wear gloves, a mask, and protective clothing to safeguard your health.
Target fabrics: For upholstered furniture and curtains, use fabric-safe sprays and consider steam cleaning.
Address hidden areas: Don’t forget to clean under furniture and in between cracks where moisture can hide.
Document for Insurance
As you begin the recovery process, it’s crucial to document all damage for your insurance claims.
Ensure you capture detailed photographs of all affected areas and items before you start any cleanup or repairs.
Keep all repair receipts organized, as these will provide essential proof of the expenses you’ve incurred during restoration.
Capture Damage Photographs
Documenting the extent of damage through photographs is crucial for your insurance claim process. When disaster strikes, it’s essential you’re armed with the right tools to capture every detail of the devastation.
This helps get a fair assessment from your insurance company and speeds up the claim process, ensuring you’re not left out of pocket for long.
Here’s how to effectively organize and present your damaged photos:
Start Immediately: As soon as it’s safe, begin taking photos. This establishes a clear damage chronology, showing the initial impact.
Cover All Angles: Capture each area of damage from multiple angles. Don’t overlook less obvious places where water might’ve seeped in.
Detail is Key: Close-up shots can highlight the severity of the water damage on materials and structures.
Maintain Photo Organization: Label each photo with the date, time, and location. This meticulous approach aids in navigating through them during the claim process.
Use High-Quality Settings: Ensure your camera or smartphone is set to the highest resolution to capture detailed images that are useful for evaluations.
Maintain Repair Receipts
Every receipt from your water damage repairs is crucial for your insurance claim. Proper receipt organization can streamline the claim process and ensure you don’t miss any crucial compensation. It’s not just about stacking them up; it’s about categorizing and safekeeping them in a way that speaks professionalism and preparedness.
For effective repair documentation, consider the following table to maintain your receipts efficiently:
| Type of Document | Details to Include | Storage Tip |
|---|---|---|
| Repair Receipts | Service description, cost, date | Use a designated folder; label by date |
| Contractor Invoices | Contractor details, warranty info | Digital copies in cloud storage |
| Material Purchases | Item description, quantity, price | Keep physical and digital copies |
| Payment Confirmations | Method of payment, confirmation number | Separate folder for quick access |
| Insurance Correspondence | Claim number, contact info, dates | Maintain a chronological file |
Make sure every document is clearly legible, and all details are accurate. It’s your right to reclaim your losses, and these organized efforts ensure that right is upheld. Remember, being methodical isn’t just helpful; it’s necessary for a seamless resolution to your water damage ordeal. By taking these steps, you’re not just repairing a house; you’re rebuilding a home.
Plan Future Prevention Measures
Many homeowners overlook the importance of proactive measures in safeguarding their property against future water damage.
It’s crucial to integrate water damage prevention and emergency preparedness into your routine to ensure you’re not caught off guard. By doing so, you’re not just protecting your home; you’re also joining a community of vigilant homeowners who prioritize safety and resilience.
Here are some actionable steps you can take to fortify your home:
Regularly Inspect Plumbing: Check your home’s plumbing system for any signs of wear and tear. Replace old or rusty pipes before they can cause problems.
Install Water Detection Devices: These devices can alert you to the presence of moisture where it shouldn’t be, allowing you to address leaks before they escalate.
Maintain Gutters and Downspouts: Clear these areas regularly to prevent blockages that can lead to water buildup and damage.
Review Your Insurance Coverage: Ensure your policy covers the types of water damage most common in your area, providing you peace of mind.
Educate Your Family on Emergency Procedures: Develop a plan that includes shutting off the main water supply and knowing whom to call in the event of a water crisis.
Taking these steps helps prevent potential disasters and strengthens the sense of security within your household.
You’re not just investing in your property but also in a community ethos of preparedness and support.
Review
You’ve taken the first steps toward restoring harmony in your home. Remember, quick actions salvage your sanctuary and fortify it against future surprises. Ensure you’ve captured every detail for your insurance safeguard and keep those new preventive strategies top of mind. By embracing these pivotal practices, you’re not just repairing—you’re enhancing your home’s resilience. Stand confident in your proactive approach; you’re well-prepared for whatever comes next.
Recent Posts
Top Techniques for Commercial Flood Water Removal
When dealing with commercial flood water removal, effectiveness hinges on the right techniques and equipment.
Mastering Commercial Flood Water Extraction Methods
In the world of disaster recovery, mastering flood water extraction is akin to maneuvering a
10 Tips for Water Damage Restoration Process
Imagine a small leak in your roof that, if left unchecked, turns into a waterfall