Contents
Imagine a small leak in your roof that, if left unchecked, turns into a waterfall cascading through your living room. When faced with water damage, every second counts. You need to assess the extent of the damage quickly and take immediate action to prevent further issues. From ensuring safety to addressing mold growth, each step plays an essential role in the restoration process. What comes next could make all the difference in your recovery journey.
Key Takeaways
- Conduct a thorough assessment to identify all affected areas and document damage with photographs and inventory for insurance purposes.
- Turn off the water supply and electricity in affected areas to prevent further damage and ensure safety during restoration.
- Use dehumidifiers and fans to dry out affected spaces, maintaining humidity levels below 60% to prevent mold growth.
- Clean and sanitize surfaces with appropriate disinfectants to eliminate potential health hazards and prevent mold development.
- Seek professional assistance promptly to ensure efficient restoration and address hidden moisture issues, preventing future damage.
Assess the Extent of Water Damage
Before you can effectively restore your space, you need to assess the extent of water damage. Start with a thorough damage assessment to identify affected areas.
Look for visible signs like discoloration, warping, or peeling paint. Use moisture detection tools, such as moisture meters, to pinpoint hidden damage behind walls and under floors.
Pay close attention to areas near plumbing fixtures, appliances, and windows, as these are often culprits of water intrusion. Document all findings meticulously, as this will help guide your restoration efforts and inform insurance claims if needed.
Don’t forget to check for any musty odors, which can indicate mold growth—a serious concern in water-damaged environments.
Ensure Safety Precautions
Once you’ve assessed the extent of water damage, it’s important to prioritize safety precautions. First, gather your safety gear, including gloves, goggles, and masks to protect yourself from contaminants. Water can harbor harmful bacteria and mold, so wearing the right equipment is vital.
Next, establish an emergency plan. Make certain everyone in your household understands the steps to take in case of further damage or hazards, such as electrical issues. Identify exit routes and safe zones to ensure everyone knows where to go if the situation worsens.
Before starting any restoration work, turn off the electricity in affected areas to prevent shocks. Additionally, be cautious of potential structural damage that could lead to falls or injuries.
Shut Off Water Supply
When you encounter water damage, your first step is to locate the main water valve and shut it off.
This action prevents any further flooding and protects your appliances from additional harm.
Taking these measures quickly can greatly reduce the overall damage to your property.
Locate Main Water Valve
Finding the main water valve is essential for minimizing damage during a water emergency. To effectively shut off your water supply, you need to know the valve location.
Typically, you’ll find the main valve near where your water line enters your home, often in basements, crawl spaces, or close to the water meter.
Familiarize yourself with common water valve types, including gate valves and ball valves, as they operate differently. Gate valves require a clockwise turn to shut off, while ball valves usually need a quarter turn.
Knowing how to identify and operate your main water valve can greatly reduce water damage and help you feel more in control during a crisis. Don’t wait until it’s too late!
Turn Off Appliances
Turning off appliances is an essential step in preventing further water damage during a leak or flooding incident. When you notice water accumulating, immediately unplug or turn off any electrical devices in the affected area.
This protects your appliances and ensures electrical safety. Water and electricity are a dangerous combination that can lead to short circuits or fires. If you’re unable to reach certain appliances, consider shutting off the main power supply to your home to minimize risks.
Additionally, turning off appliances helps reduce the load on your electrical system while restoration efforts are underway. Remember, acting quickly can mitigate damage and save you from costly repairs down the line.
Stay safe and prioritize your well-being during this process.
Prevent Further Damage
After ensuring that all electrical appliances are safely powered down, the next step is to shut off the water supply. This action is essential to prevent further damage and minimize the risk of mold growth.
Here’s what you should do:
- Locate the main water shut-off valve and turn it off.
- Inspect any visible leaks and address them immediately.
- Consider implementing waterproofing techniques and installing moisture barriers to protect your home from future incidents.
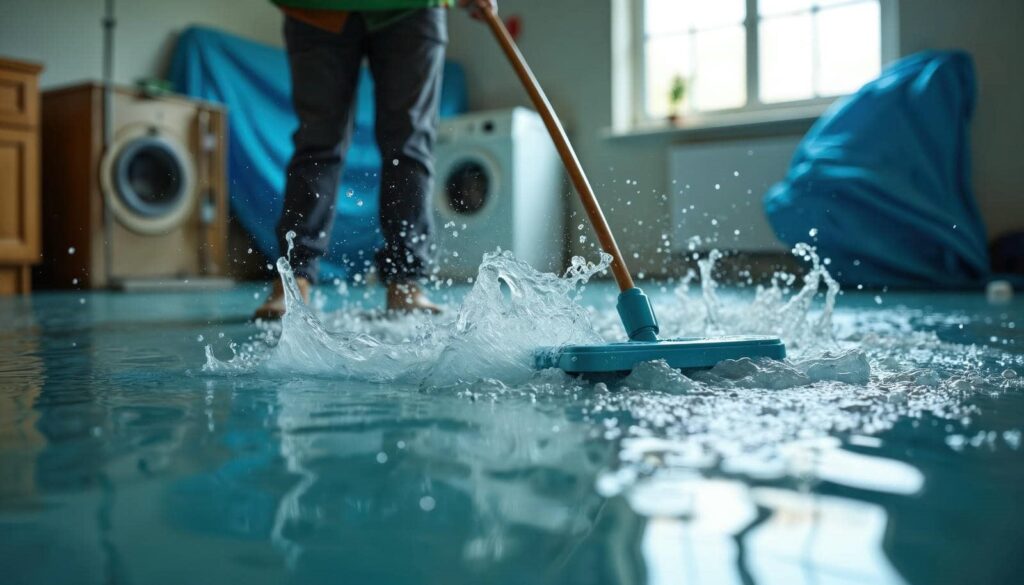
Remove Standing Water
To effectively remove standing water, start by evaluating the water levels in the affected area.
Use appropriate pump equipment to extract the water efficiently, ensuring you don’t miss any hidden pockets.
Finally, confirm that proper drainage is established to prevent future accumulation.
Assess Water Levels
As you assess water levels in your space, it’s crucial to identify and remove any standing water promptly, since stagnant water can lead to further damage and mold growth.
Begin with effective water level monitoring to gauge the extent of the flooding. Conduct a thorough flood risk assessment to understand potential sources and future threats.
Here are key steps to keep in mind:
- Use tools like moisture meters to measure water levels accurately.
- Document affected areas to prioritize removal efforts.
- Regularly check and adjust your monitoring strategy as conditions change.
Use Pump Equipment
Once you’ve assessed the water levels, the next step is to remove standing water efficiently.
You’ll want to choose the right pump types based on the volume and depth of water present. Submersible pumps are ideal for deep water, while utility pumps work well for smaller areas.
Before using any pump, ensure proper equipment maintenance; check hoses for leaks and make sure the pump is in good working order.
Set up the pump in the lowest area and let it do its job, monitoring it regularly to prevent any clogs or malfunctions.
Once the standing water’s cleared, you can move forward with drying and restoring your space, ensuring a thorough and effective recovery process.
Ensure Proper Drainage
Ensuring proper drainage is essential for effective water damage restoration. Without efficient drainage systems, standing water can persist, leading to further damage and mold growth.
Here’s how to manage water flow effectively:
Identify problem areas: Locate spots where water tends to accumulate, like basements or low-lying areas.
Clear debris: Remove any blockages from gutters, downspouts, and drainage channels to promote unobstructed water flow.
Install drainage solutions: Consider sump pumps or French drains to redirect excess water away from your property.
Dry Affected Areas
To effectively restore areas affected by water damage, it’s vital to dry them promptly and thoroughly. Start by evaluating the extent of the moisture and prioritize the most affected spaces.
Utilize dehumidification methods, such as portable dehumidifiers, to extract excess moisture from the air. This speeds up the drying process and prevents mold growth.
Increase air circulation by opening windows and using fans strategically to promote evaporation. Make sure that air is directed towards damp surfaces and materials.
If available, industrial air movers can greatly enhance airflow, aiding in quicker drying. Monitor humidity levels regularly to confirm that they’re decreasing, as maintaining a relative humidity below 60% is imperative for effective restoration.
Clean and Sanitize Surfaces
After drying the affected areas, cleaning and sanitizing surfaces is essential to eliminate contaminants and prevent health risks.
You’ll want to utilize effective cleaning agents that target bacteria, mold spores, and other harmful pathogens. Here are some useful surface sanitization techniques to contemplate:
- Use a mixture of water and vinegar for non-porous surfaces to disinfect naturally.
- Apply commercial disinfectants, ensuring they’re EPA-approved for effectiveness.
- Utilize steam cleaning for fabrics and carpets, as heat can effectively kill germs.
Always follow the manufacturer’s instructions for any cleaning products you use.
Don’t forget to wear gloves and a mask to protect yourself during the process.
By thoroughly cleaning and sanitizing surfaces, you not only create a safer environment but also promote a sense of belonging and well-being in your space.
Inspect for Mold Growth
Once surfaces are cleaned and sanitized, it’s important to check for any signs of mold growth. Mold can develop within 24-48 hours in damp conditions, making early detection essential for effective mold prevention. Look for visible mold, musty odors, and water stains.
| Signs of Mold | Potential Causes | Actions for Treatment |
|---|---|---|
| Visible mold spots | High humidity | Use mold treatment solutions |
| Musty odors | Leaks or flooding | Remove affected materials |
| Water stains | Poor ventilation | Improve airflow and dryness |
Addressing these issues promptly prevents further mold growth and ensures a healthier living environment. If you find extensive mold, consider contacting professionals for thorough mold treatment. Remember, staying proactive is key to maintaining a safe space for you and your loved ones.
Repair Structural Damage
Repairing structural damage is essential for restoring the integrity of your home after water damage.
It’s vital to address any compromised areas promptly to ensure safety and prevent further issues. Start by evaluating the affected structures and determining what needs repair.
Here are some key steps to follow:
Remove damaged materials: Identify and safely remove any wood, drywall, or insulation that’s been compromised.
Dry the area: Confirm all moisture is eliminated to prevent mold growth and further structural degradation.
Use appropriate repair materials: Select quality materials that will restore your home’s structural integrity effectively.
Document the Damage
Documenting the damage is essential, as it provides a clear record for insurance claims and future repairs. Start by taking extensive photographic evidence of the affected areas. Capture images from various angles to ensure you have a full view of the damage. This will help support your claims and serve as a reference for repairs.
Next, create a detailed damage inventory. List all damaged items, including furniture, appliances, and structural features. Be specific about the extent of the damage to each item. Include purchase dates and approximate values, as this information can be critical for your insurance adjuster.
Don’t forget to document any previous damage that may be relevant. Keeping thorough records helps streamline the claims process and reinforces your position when discussing repairs with contractors.
Seek Professional Assistance
When dealing with water damage, seeking professional assistance is vital.
Experts in restoration techniques can efficiently assess the situation and implement effective solutions.
Their quick response time minimizes further damage and helps restore your property promptly.
Expertise in Restoration Techniques
Although tackling water damage on your own might seem feasible, seeking professional assistance often proves essential for effective restoration.
Experts bring specialized knowledge and advanced restoration technology to the table, ensuring that the job is done right the first time. They use expert techniques that you mightn’t be familiar with, helping to prevent further damage.
Here are some key benefits of professional assistance:
Thorough Assessment: Professionals conduct detailed inspections to identify all affected areas.
Advanced Equipment: They utilize state-of-the-art tools for extraction and drying that aren’t typically available to homeowners.
Long-Term Solutions: Experts focus on restoring your property and preventing future issues, not just quick fixes.
Trusting professionals can save you time, effort, and ultimately, money.
Quick Response Time
A rapid response is essential when dealing with water damage, as the longer the water sits, the more extensive the damage can become.
When you notice a leak or flooding, don’t hesitate to seek professional assistance. An emergency response team can provide a rapid assessment of the situation, identifying hidden sources of moisture and potential hazards.
They possess the expertise and equipment necessary to mitigate damage quickly, which can save you time and money in the long run. By engaging professionals, you ensure that the restoration process is handled efficiently and effectively.
Remember, immediate action protects your property and fosters a sense of security and belonging within your community.
Don’t wait—act now to safeguard your home.
Frequently Asked Questions
How Long Does the Water Damage Restoration Process Usually Take?
The restoration timeline typically spans from a few days to several weeks, depending on damage severity. Effective drying techniques are essential in expediting the process, ensuring your space returns to normal as quickly as possible.
What Types of Insurance Cover Water Damage Restoration Costs?
Homeowner policies often cover water damage, but flood insurance specifically protects against flooding issues. You’ll want to review your coverage to ensure you’re adequately insured for potential water-related woes and their restoration costs.
Can I Handle Water Damage Restoration Myself?
You can handle water damage restoration yourself with DIY restoration, but you’ll need essential tools like a wet vacuum, fans, and dehumidifiers. Make certain you assess the damage carefully to avoid further complications.
What Are the Signs of Hidden Water Damage?
You’ll notice signs of hidden water damage through unexpected mold growth, musty odors, or damp spots on walls and ceilings. Additionally, check for hidden leaks behind appliances or plumbing fixtures that may indicate underlying issues.
How Can I Prevent Future Water Damage in My Home?
Preventing future water damage in your home is like fortifying a castle. Regularly maintain drainage systems and use waterproof materials in vulnerable areas, ensuring a resilient barrier against moisture and protecting your space from potential harm.
Recap
In the wake of water damage, don’t let despair wash over you. By swiftly evaluating the situation, ensuring safety, and employing effective restoration techniques, you can turn the tide in your favor. Remember, every drop you mitigate brings you closer to reclaiming your space. When in doubt, don’t hesitate to call in the pros—they can be the lifeline that transforms your disaster into a distant memory. With diligence and care, you can restore your home to its former glory.
Recent Posts
Why Follow These Steps for Water Damage Restoration?
When facing water damage, it’s essential to follow a structured approach to restoration. Each step,
Five Steps for Successful Water Damage Recovery
When faced with water damage, your response must be methodical and precise. Start by evaluating
What Are Nearby Burst Pipe Repair Services?
When a burst pipe occurs, it’s essential to act quickly. Local emergency plumbers specialize in