
Contents
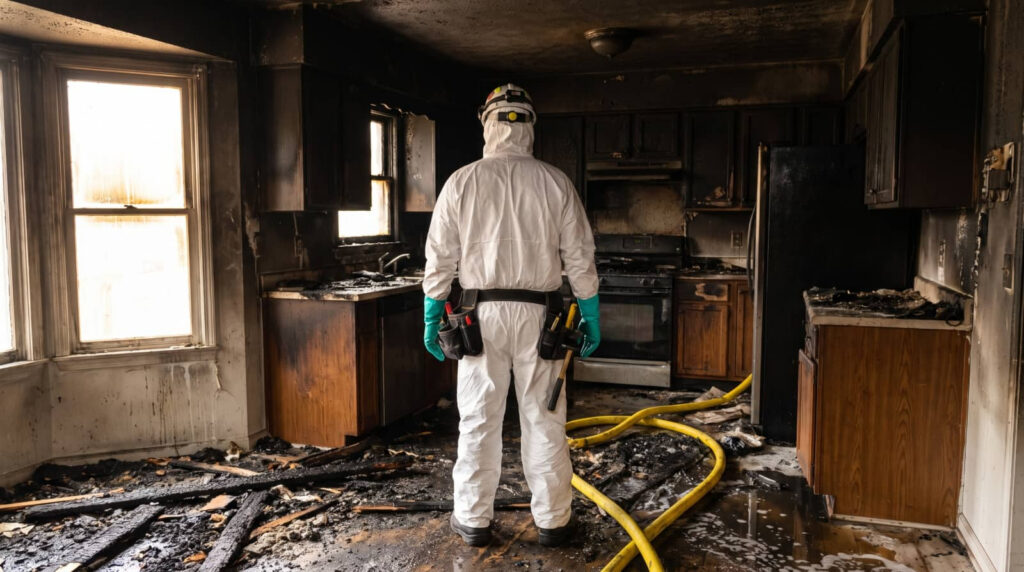
You might think the hard part ends when the flames go out, but the real cleanup starts there. You’ll secure the property, inspect fire, smoke, and water damage, and then remove debris and unsalvageable items. Next, you’ll clean soot, control odors, dry affected areas, and assess structural repairs. Each step follows a set sequence, and what happens after that can determine how safely your home comes back to life.
Key Takeaways
- Inspect and document fire, smoke, water, and structural damage to prioritize cleanup and repairs.
- Secure the property by boarding openings, stabilizing hazards, and controlling access.
- Remove debris and clean soot from surfaces using safe methods and proper protective gear.
- Dry affected areas with dehumidifiers, air movers, and moisture monitoring to prevent mold.
- Repair damaged framing, finishes, HVAC, and utilities before verifying the home is safe to reoccupy.
Fire Damage Cleanup Steps
The fire damage cleanup process starts with a careful assessment of the affected area so you can identify structural concerns, smoke penetration, soot buildup, and salvageable materials.
You then document conditions, map each zone, and prioritize tasks so your team works efficiently and safely.
Next, you remove debris, charred materials, and nonrecoverable contents to open access for detailed cleaning.
You’ll clean soot from hard surfaces using the right detergents and controlled agitation, then treat smoke odors with targeted deodorization methods.
After that, you dry affected areas to limit lingering moisture and prepare surfaces for repairs.
Throughout the fire damage cleanup process, you follow a measured sequence that helps you regain control, protect recoverable materials, and restore a sense of normalcy.
Secure the Property After a Fire
Before cleanup begins, you should secure the property to prevent further damage, limit safety risks, and protect remaining contents. You can start by boarding broken windows, tarping roof openings, and closing off unstable areas with temporary barriers.
Then you should shut off utilities only if it’s safe and authorized, so you reduce hazards while the site stays controlled. You’ll want to document access points and keep a clear entry log for your team, which helps everyone stay coordinated.
If locks or doors were compromised, replace or reinforce them right away. These steps create a stable work zone and help you feel confident that your space is protected.
When you act quickly and methodically, you support a smoother recovery and protect the people and belongings that matter most.
Inspect Fire, Smoke, and Water Damage
You’ll start with a structured fire damage assessment to identify structural impacts, charring, and compromised materials.
Next, you’ll inspect smoke damage to track soot spread, odor sources, and contamination patterns across surfaces and HVAC pathways.
You’ll also evaluate water damage from suppression efforts so you can document moisture intrusion, prevent hidden deterioration, and plan the right cleanup steps.
Fire Damage Assessment
A thorough fire damage assessment starts by inspecting structural fire effects, smoke penetration, and water intrusion from firefighting efforts. You’ll walk the space with a trained eye, noting warped framing, cracked finishes, and compromised materials.
This step helps you understand what’s safe, what needs removal, and what can stay. You’re not guessing; you’re building a clear recovery plan with your restoration team.
- Identify load-bearing damage and hidden weakness.
- Map soot patterns and heat exposure zones.
- Document affected rooms, contents, and finishes.
- Record moisture signs for later drying plans.
With a methodical assessment, you gain control early and stay connected to each next step. Your property’s condition becomes easier to manage, and your path forward feels more organized and less overwhelming.
Smoke And Water Inspection
Once the fire is out, you inspect for smoke, soot, and water damage together, because each one affects the cleanup plan differently.
You trace residue on walls, ceilings, vents, and contents, then note where water from hoses or sprinklers has soaked framing, flooring, and insulation.
You check for hidden moisture in cavities, since trapped water can spread damage and encourage mold.
You also identify smoke migration paths, because odors and corrosive particles can travel far beyond the burned room.
As you document each affected area, you help your crew build a clear, shared plan for drying, cleaning, and repairs.
That careful review gives you a steady path forward and helps your property feel manageable again.
Remove Debris and Unsalvageable Items
Start by removing loose debris and any items that can’t be salvaged, since they can hold soot, smoke residue, and moisture that slow cleanup and increase odor. You’ll create safer access, reduce hidden hazards, and help your team work with confidence and care.
Bag small fragments and contaminated waste.
Separate structurally unstable materials.
Tag items that need disposal approval.
Clear pathways for drying and repairs.
Work methodically, and don’t mix debris with belongings you may keep. Use gloves, masks, and sturdy containers so you stay protected while you sort.
When you remove damaged materials early, you make the next recovery steps smoother for everyone involved. Your home can start feeling organized again, and you’ll know the process is moving forward.
Clean Soot From Surfaces and Contents
Soot leaves a fine, acidic residue that can stain finishes and continue damaging surfaces if you leave it in place. You’ll want to clean it methodically, room by room, using dry-cleaning sponges, microfiber cloths, and the right detergents for each material.
Start high and work down so you don’t redeposit particles. Vacuum loose soot with a HEPA-filter unit before wiping, and use light pressure to avoid grinding residue into paint, wood, or fabric.
Test any cleaner on a small hidden area first, then treat walls, ceilings, trim, cabinets, and salvageable contents. For porous items, follow manufacturer guidance and document what you save.
As you work, wear gloves and a mask, keep surfaces dry when possible, and track progress so your home feels organized again.
Remove Smoke Odors From Your Home
You’ll start by locating the odor sources, including hidden soot in porous materials, voids, and damaged contents.
Then you’ll use deep smoke deodorization methods to neutralize residual odors at the material level, not just mask them.
After that, you’ll treat your HVAC system so smoke particles don’t recirculate through your home.
Source Odor Detection
To remove smoke odors from your home effectively, you first need to detect the source of the smell, since odor often lingers in hidden materials long after visible damage is gone.
You’ll work like a careful inspector, checking where smoke settled and where air still traps residue. Use a flashlight, note airflow paths, and trust your senses.
- Inspect attic insulation, wall cavities, and crawlspaces.
- Check HVAC returns, ducts, and filters.
- Smell soft goods, trim, and stored items.
- Trace odor near outlets, vents, and framing.
When you map these hotspots, you can target the right areas with confidence.
That method helps you feel in control, supported, and ready for the next cleanup step.
Deep Smoke Deodorization
Once you’ve identified where smoke odor is collecting, you can start deep deodorization with a targeted plan that treats both visible surfaces and hidden materials.
You should clean hard surfaces with the right detergent, then wipe away residue before it can reattach to nearby materials.
Next, you’ll address porous items with controlled deodorizing agents that neutralize odor molecules instead of masking them.
Washable fabrics, cushions, and linens need careful laundering or sealed treatment, depending on damage level.
For enclosed spaces, you can use absorption methods and odor-counteracting products to reach lingering smoke trapped in trim, cabinets, and wall cavities.
Work in sections, test each area, and repeat as needed.
This approach helps you reclaim a cleaner, safer home and feel confident returning to it.
HVAC Odor Treatment
If smoke odor has settled into your heating and cooling system, HVAC odor treatment can stop it from circulating through the home. You’ll restore cleaner air by combining filtration, coil cleaning, duct deodorizing, and airflow checks.
A technician can inspect each component, remove soot residue, and apply neutralizing agents that bind odor molecules instead of masking them. You belong in a healthier space again, and this process helps make that possible.
- Replace contaminated filters.
- Clean supply and return ducts.
- Treat evaporator coils and blower parts.
- Verify system performance after deodorizing.
When you address the HVAC early, you reduce lingering smells, protect restored surfaces, and support the next cleanup steps with confidence and control.
Dry Out Water-Damaged Areas
After the fire is out and standing water is removed, you’ll need to dry all water-damaged areas quickly to prevent mold, corrosion, and further structural damage.
You should open affected rooms, improve airflow, and place dehumidifiers and air movers where moisture lingers. Focus on carpets, padding, drywall, insulation, and hidden cavities, since these areas trap water and slow evaporation.
Use moisture meters to track progress, and keep drying until readings return to safe levels. If you notice warped materials, musty odors, or damp insulation, keep the equipment running and document the conditions.
Prompt drying helps protect your home’s air quality and gives your cleanup team a stable environment for the next phase. You’re not alone in this; steady, careful drying sets the foundation for recovery.
Repair Structural Fire Damage
With the site dried and stabilized, you can begin repairing the structural fire damage by addressing any compromised framing, joists, subflooring, roofing, and load-bearing elements. You’ll work with your contractor to verify that each member still meets code and can safely carry its design load.
Replace charred or warped wood.
Sister weakened joists and studs.
Reinforce damaged connections and anchors.
Verify alignment before closing openings.
You should also check for hidden heat damage around masonry, fasteners, and metal connectors, since these parts can lose strength without obvious collapse.
Each repair should restore stability first, then prepare the structure for the next phase. When you follow a methodical plan, you’re not alone—you’re rebuilding a safe, dependable space with a team that knows what to look for and how to fix it.
Rebuild and Restore Fire-Damaged Areas
Once the structure is stable, you can begin rebuilding and restoring the fire-damaged areas by replacing damaged finishes, reinstalling fixtures, and repairing systems in a controlled sequence.
You’ll want to coordinate framing, drywall, insulation, electrical, plumbing, HVAC, and flooring so each trade supports the next.
Confirm moisture levels, soot removal, and smoke treatment are complete before you close any cavity or seal any surface.
Choose materials that match code requirements and the original layout, then verify every connection and test each system before occupancy.
Keep communication open with your contractor so you feel informed at every step.
This careful process helps your home regain safety, function, and comfort, and it brings your space back to the place where your household belongs.
Wrap-Up
After the flames are out, you’re not just left with charred surfaces—you’re left with a system that needs careful, methodical recovery. By securing the property, documenting damage, removing debris, cleaning soot, drying hidden moisture, and repairing structural issues, you create a safe path forward. Don’t wait for the smell of smoke to fade on its own; imagine it trapped in walls, ducts, and fabrics. With coordinated cleanup, your home can be stabilized, restored, and made livable again.
Recent Posts
Inside the Sewage Cleanup Process: Removal, Sanitation and Drying
Most sewage backups lead to hidden structural contamination beyond the visible spill. You’ll need to
Sewage Cleanup Cost: Factors That Can Affect Your Estimate
When wastewater intrusion interrupts your space, sewage cleanup cost can shift quickly depending on the
What to Do After a Sewage Backup Before Cleanup Begins
When a sewage backup rises like an unwelcome tide, sewage backup requires you to move